Report settings
This menu is used to create and manage the settings for run reports.
It is linked to the configuration of a report directly in the Missions menu, by consulting an executed mission.
A default report configuration can be defined in the Preferences menu.
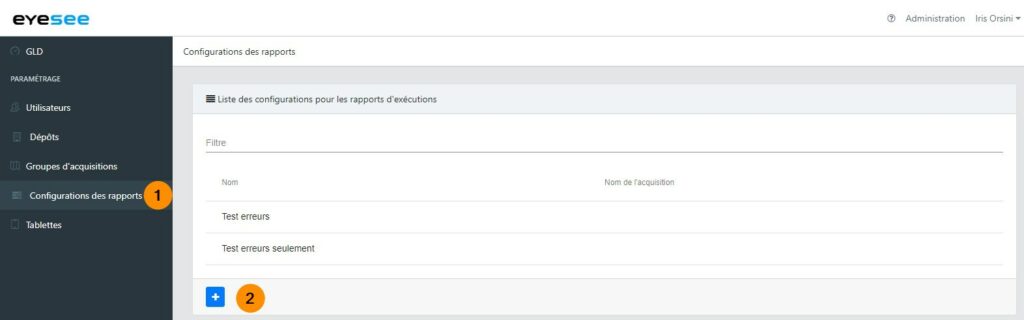
1. Click on the Report settings menu. The list of existing settings is displayed.
2. Click the add icon to create a new setting.
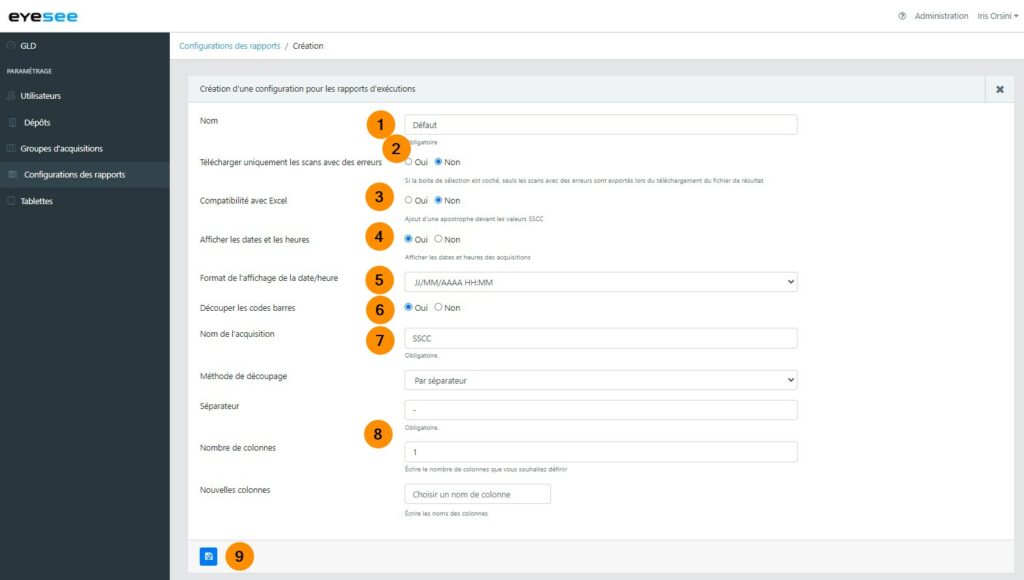
1. Enter a name for this report configuration.
2. Download only scans with errors: tick YES if you only want to download scans with errors (NO_SCAN or expected code different from the code read).
3. Excel compatibility: by ticking YES in this option, an apostrophe will be added in front of all the codes in the table, and also in the CSV file to be downloaded.
Excel overwrites all the digits from the 16th onwards, replacing them with zero. To avoid this formatting, this option transforms each scanned code into a character string, which remains intact when the CSV file is opened with Excel.
4. Display acquisition times: setting this option to YES displays the date and time for each scan acquisition, which will also appear in the CSV file when downloaded.
5. In this case, 5 date and time formats are possible:
- JJ/MM/AAAA HH:MM
- JJ Mois AAAA HH:MM
- MM/DD/YYYY HH:MM
- Month DD, YYYY HH:MM
- yyyy-mm-dd-hh-mm-ss-mss
6. Barcode slicing: slicing barcodes according to several numbers of characters or according to a separator: this option allows you to slice scanned barcodes according to the desired acquisition.
7. Name of scanner acquisition to be sliced.
8. Slicing method: 2 possibilities:
- « By number of characters »
- « By separator »
The number of columns created depends on the user’s choice for the number of characters option, while for the separator option it depends on the number of separators entered.
You can name these columns or leave the name fields empty.
The CSV file download takes into account the barcode slicing.
9. Then click on the save icon.