Create a file of expected
This file is created from a file that is extracted from the WMS.
It can contain all the expected codes of a warehouse : when you create a mission with expected on a face, there will be an automatic selection of expected codes for the locations on the chosen face.
The CSV file must only contain the columns of:
- Location names
- Codes to be retrieved for each location
Because of a Microsoft Excel data formatting of long numbers (read the article), a few actions are necessary to create the CSV file of expected from an extraction file of the WMS:
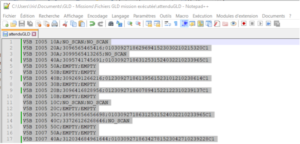
- Right click on the file result > click on Edit with Notepad ++ (or another text editor). Then, select the entire data (CTRL + A) and copy (CTRL + C)
2. Open a new Excel file and paste (CTRL + V) the entire selection in column A
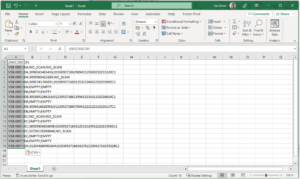
Important: as long as the modifications are not finished, the file must be in text format (.xlsx) :
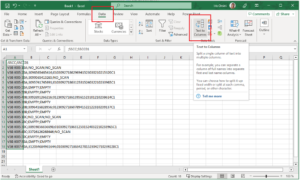
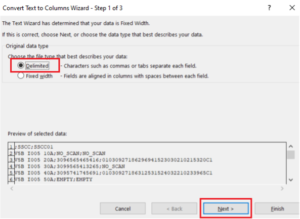
3. Select column A, click on Data menu, then click on Text to Columns:
4. Select Delimited, then Next:
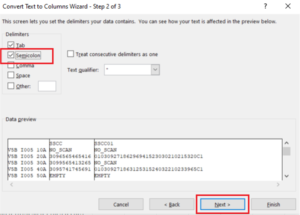
5. Select Semicolon, then Next:
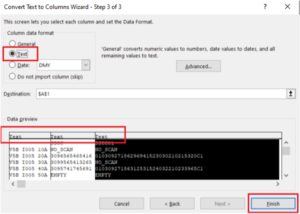
6. Select Text for each column, then Finish:
7. If there is not, add a new line at Line 1. Write in B1 (and C1, etc) the names of the acquisitions corresponding to the names of the acquisitions present in the group you will select for this face. The names are case-sensitive. (1 column per acquisition).

8. Check:
-
- locations names correspond to the real ones (pay attention to spaces, hyphens, etc)
- line 1: the cells B1 and eventually C1, etc correspond with the acquisitions names of the chosen group (when creating a mission with expected)
- there is no unnecessary data after a copy/paste
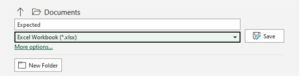
9. Once the modifications and verifications are finished, you can save the file in CSV format (Comma delimited):
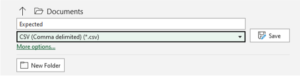
The CSV file is now ready to be imported when creating a mission with expected.