Welcome to the EYESEE Solution support
-
EYESEE SOLUTION
-
GETTING STARTED
-
EYESEE DRONE
-
EYESEE CLOUD
-
EYESEE APP
-
EYESEE TUTORIALS
-
Q&A
-
- As a drone for logistics automation, what types of labels and barcodes can it read?
- Can the drone operate at the same time as other equipment and machinery in the warehouse?
- Do I need to modify my deposit to use EYESEE Drone? Can I use any of my existing labels?
- Does EYESEE Drone work with bulk storage, ground storage or picking areas?
- Does EYESEE support RFID?
- Does the EYESEE solution work in a negative-temperature warehouse?
- How do I create a warehouse map?
- How does the EYESEE drone navigate its way around the warehouse?
- How long does it take to scan a warehouse?
- Is the drone able to count stocks?
- Is the drone compatible with all the WMS on the market?
- Is the drone fully autonomous?
- What is the battery life of the EYESEE Drone?
-
< All Topics
Add one or more users
Updated7 March 2024
ByDiandra Cristache
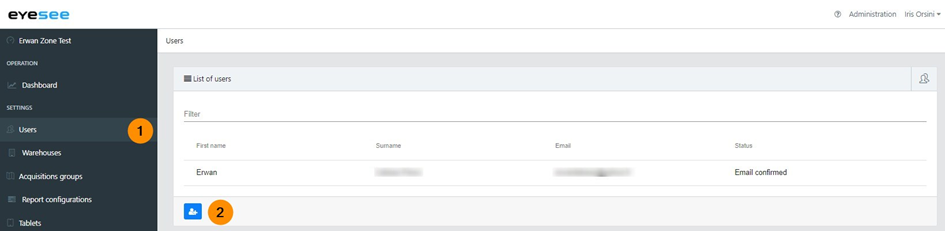
1. In the left-hand menu, click on Users
2. Click on the add icon
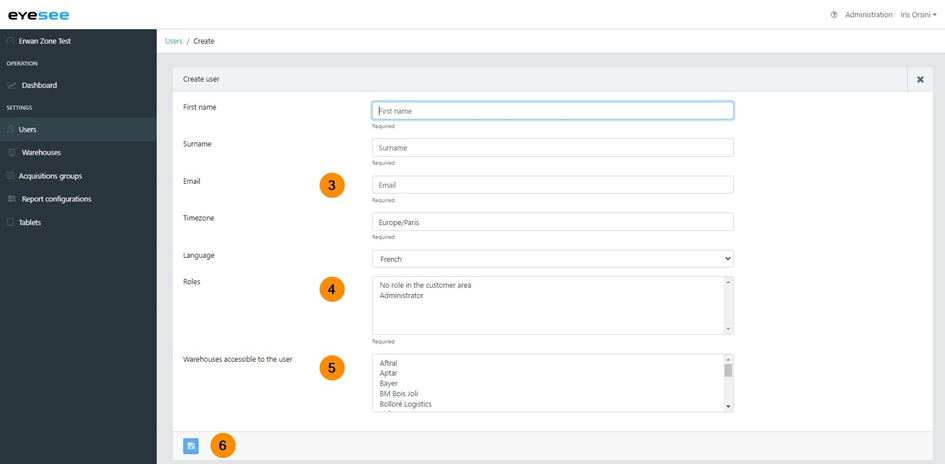
3. Fill in the new user’s information: first name, surname(last name), email, time zone (city), language.
4. Attribute one or more roles from the three options (administrator, warehouse administrator, operator) (CTRL + click to pick multiple):
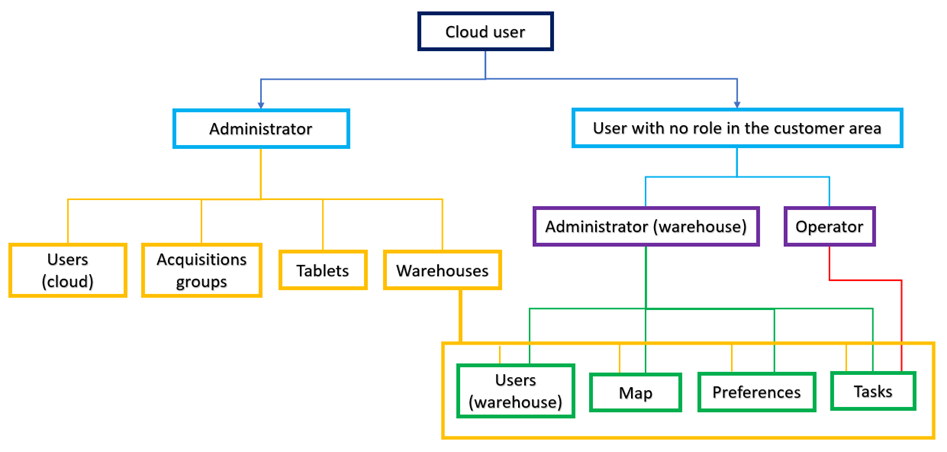
a. Administrator (full access)
b. No role in the customer area:
5. Select one or more warehouses accessible to the user (CTRL + click to pick multiple).
For this/these warehouse/s, choose the role: administrator or operator:
1. Administrator
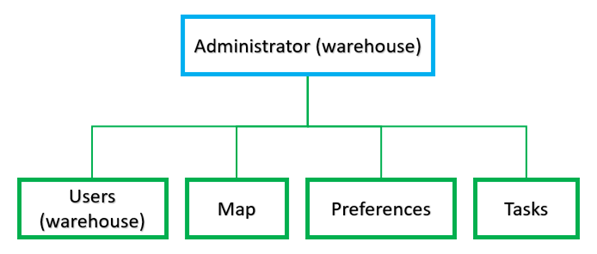
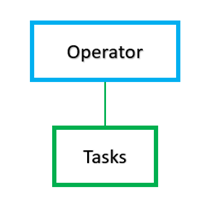
2. Operator

6. Save
For more details:
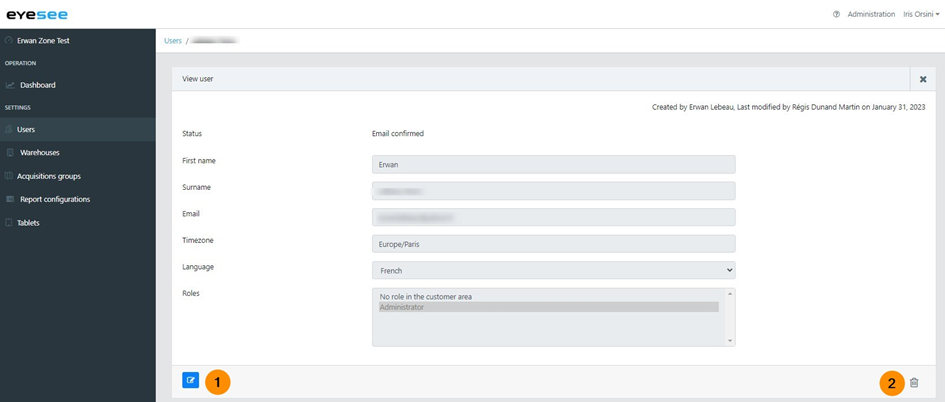
1. To modify a user or a role: click on the modification icon and save
2. To delete a user: click on the delete icon
Table of Contents