The EYESEE Cloud interface allows you to enable or disable mission retrieval from the EYESEE App.
Disable mission recovery to make the mission invisible in the list of missions on the EYESEE App.
Inversely, enabling mission recovery makes the mission visible in the list of missions on the EYESEE App.
To disable the recovery of a mission, go to your EYESEE Cloud account > Missions. Find the mission you want to make invisible on the EYESEE App. In the example below, we want to make the mission named 42 IMPAIR invisible.
In the table of your missions on EYESEE Cloud, two green buttons appear in the right-hand column. The first button allows you to “Disable mission recovery“.
Click on this button next to the mission you wish to make invisible. Below, we disable the recovery of mission 42 IMPAIR :
Refresh the web page.
The same button now appears in red. Mission 42 IMPAIR is no longer visible in the list of missions on the EYESEE App.
You will also be able to make the mission visible again on the EYESEE App.
In the table of your missions on EYESEE Cloud, click on the same button used previously: “Enable mission recovery“.
Refresh the web page.
Once recovery of the mission has been authorised, the button will reappear in green, and the mission will once again be visible in the list of missions on the EYESEE App.
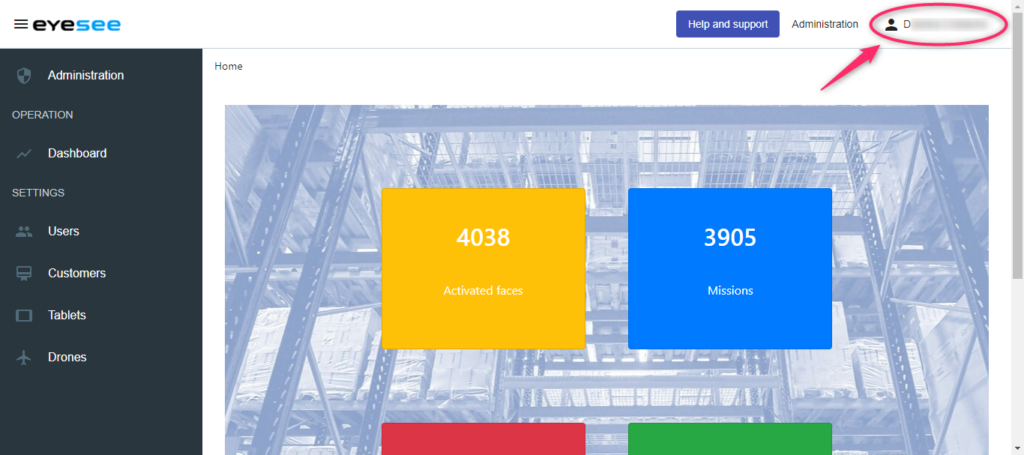
To change your user password, click on your first name at the top right of the EYESEE Cloud home interface.
Enter your old password [1]. Then enter your new password [2] and confirm it [3].
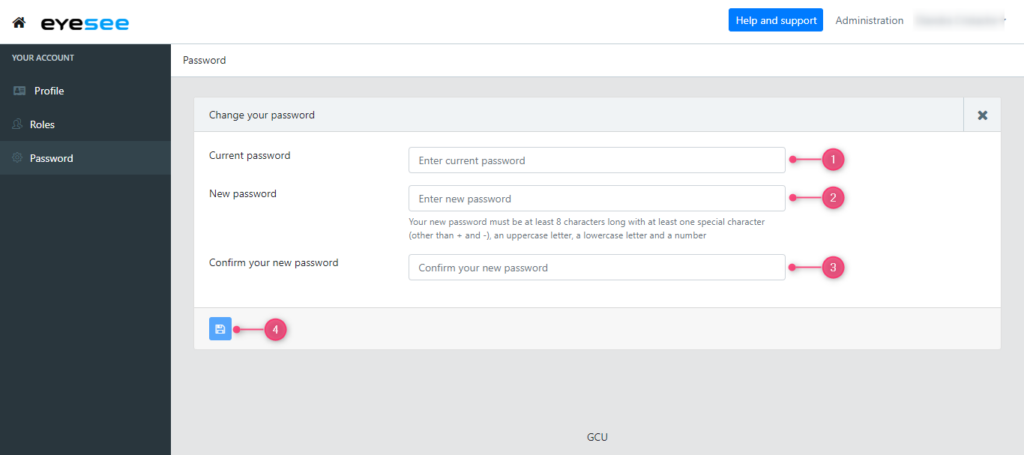
Click on the save icon [4].
Your user password has now been changed.
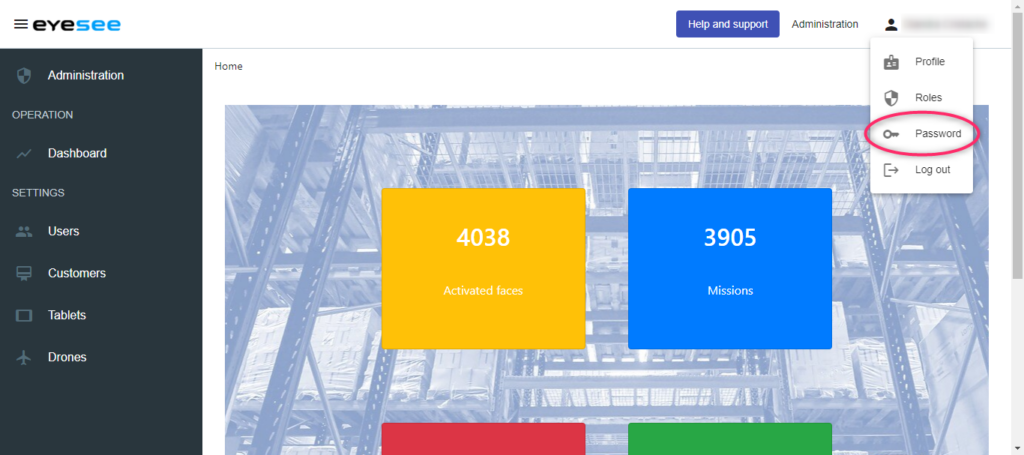
Then click on Password.
Step 1 of the mission launch or resumption reminds you of the positioning of the solution (EYESEE Drone and EYESEE Tags) and indicates the name of the first location of the mission in front of which the EYESEE Drone should be placed, approximately 1 metre away from the pallets.
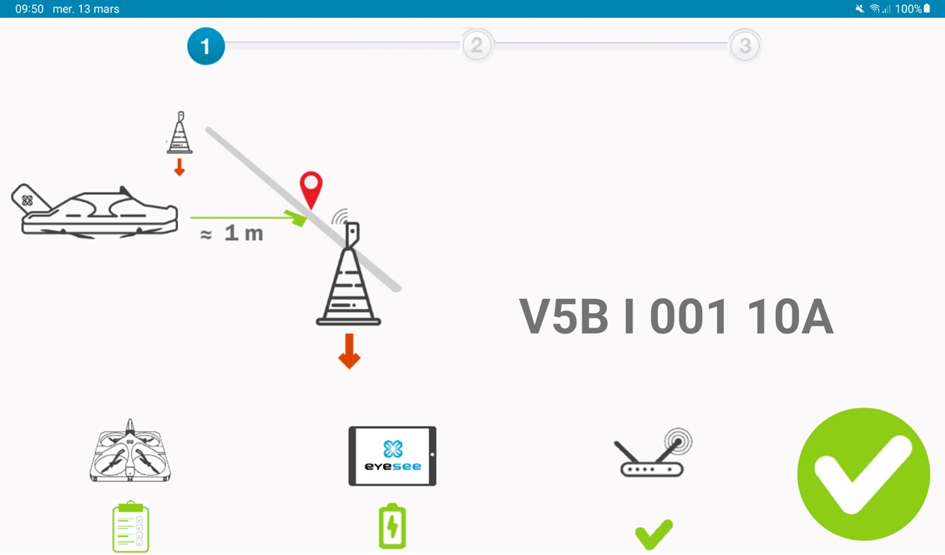
The lower part of the screen shows :
To view the details of the EYESEE Drone Pre-Arm checklist, click on the Drone icon at the bottom left of the screen.
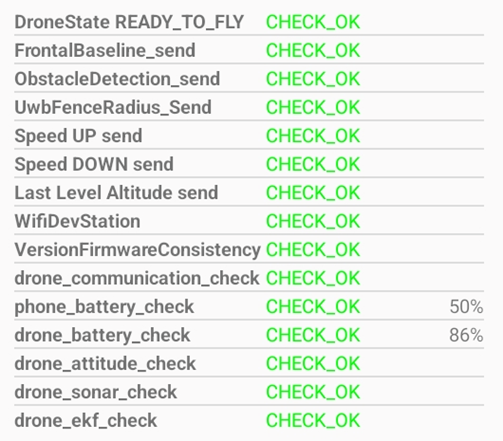
When the solution is operating normally, all the items in the checklist are marked “CHECK_OK“:
If one or more checklist items cannot be validated, the items in question will be marked “CHECK_FAILED“.
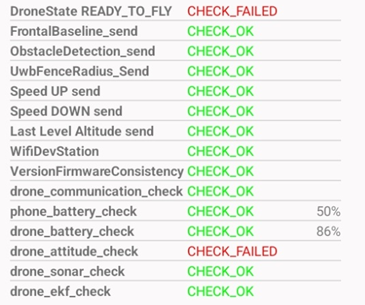
EYESEE Drone must be restarted after each flight. If EYESEE Drone is not restarted, the check will fail and the CHECK_FAILED message will be displayed.
If the check fails even though EYESEE Drone has been restarted, try returning to the application’s main screen before restarting your mission.
Checks that flight parameters have been correctly sent.
If the check fails, make sure that the Wi-Fi connection is of good quality. Make sure that there are no sources of interference between the EYESEE Drone and the Wi-Fi router. Then return to the application’s main screen and restart the mission.
If the issue persists, restart EYESEE Drone.
If the problem persists after restarting EYESEE Drone, please contact the EYESEE support service at help@eyesee-drone.com.
If the version of your autopilot is out of date, the message CHECK_FAILED is displayed.
To update your version of the autopilot, go to EYESEE App > Drones > Update packages.
Check that EYESEE Drone is communicating with the tablet.
If the check fails, make sure that the Wi-Fi connection is of good quality. Make sure that there are no sources of interference between the EYESEE Drone and the Wi-Fi router. Then return to the application’s main screen and restart the mission.
If the issue persists, restart EYESEE Drone.
If the problem persists after restarting EYESEE Drone, please contact the EYESEE support service at help@eyesee-drone.com.
Checks whether the tablet’s battery has enough charge to carry out the mission.
Check that the EYESEE Drone’s battery is sufficiently charged to carry out the mission.
If the battery level is insufficient, replace the discharged battery with a charged one.
To take off correctly, EYESEE Drone must be correctly positioned on the ground and flat.
If this check fails (CHECK_FAILED), restart EYESEE Drone and do not handle it during the start-up phase.
If the problem persists after restarting EYESEE Drone, please contact the EYESEE support service at help@eyesee-drone.com.
Check that the EYESEE Drone’s sonars are returning normal values.
This check fails (CHECK_FAILED) when one of the sonars returns an abnormal value. In this case, check that the sonars are not obstructed. If necessary, blow on the six sonars to remove any dust.
Checks that the EYESEE Drone position has been initialised.
If this check fails (CHECK_FAILED), restart EYESEE Drone and do not handle it during the start-up phase.
If the problem persists after restarting EYESEE Drone, please contact the EYESEE support service at help@eyesee-drone.com.
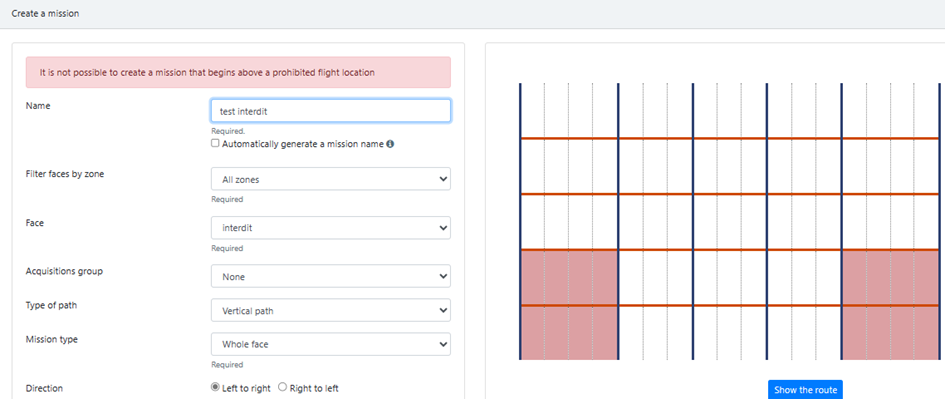
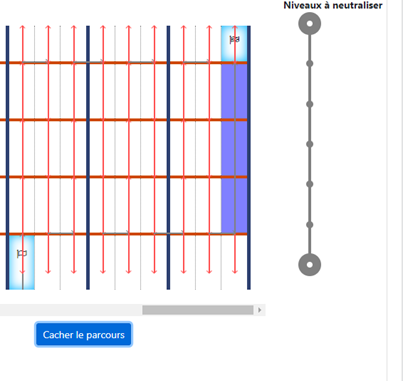
When creating a mission on a face, if there is a column with flight constraints, always click on the « Draw the route » button to check that the flight plan takes account of all the locations to be inventoried. If this is not the case, select another type of mission (between two locations, for example).
Example :
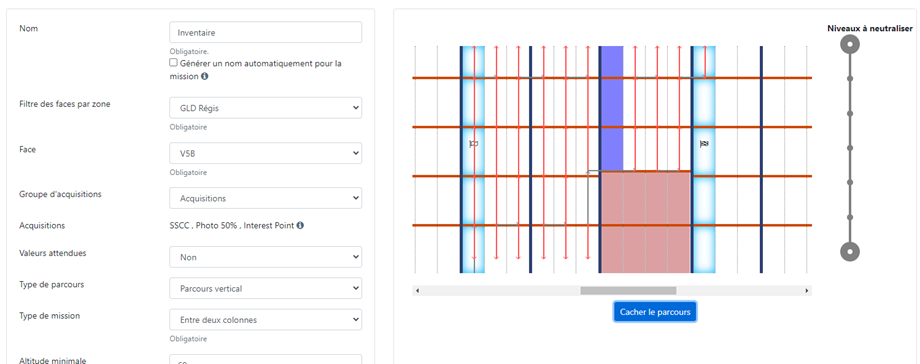
In this case, with an « Between two columns » configuration, on the right-hand column, EYESEE Drone will not scan the 4 locations on its downward movement (the generator is mistaken about the position of the last location).
You therefore need to choose an « Between two locations » configuration, so that EYESEE Drone can inventory them.

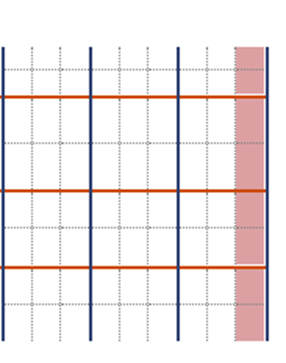
This is also the case if the mission begins or ends on a column that has locations with a flight ban constraint. In this case, EYESEE Drone will miss a slot.
First of all, the mapping needs to be modified, by replacing the flight constraints in the first or last « No-fly » column with « Not in use ».
The example below illustrates the presence of a trolley passage at the beginning and end of the aisle:
To be able to take off, you will have to modify the cartography as follows:
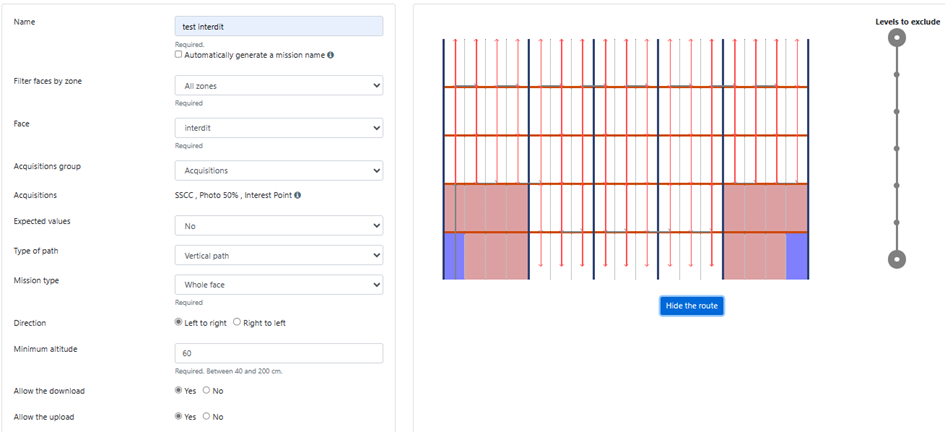
Then, by clicking on the « Draw route » button, check that the flight plan includes all the locations to be surveyed. If this is not the case, change the mission type.
With a « No Fly » flight constraint and depending on the type of mission selected, some locations will not be inventoried:
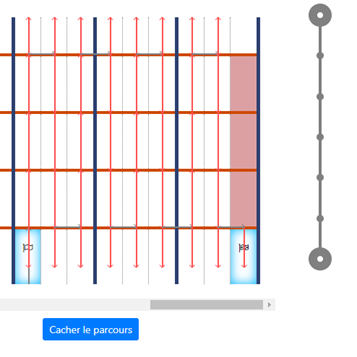
In the following case, it will not be possible to save the mission:
If there is no risk for EYESEE Drone, it is possible to change the flight constraint for these locations to « Not in use ». In this case, EYESEE Drone will fly past all the locations.
Please note that this solution is only possible if there is no danger of collision for EYESEE Drone.
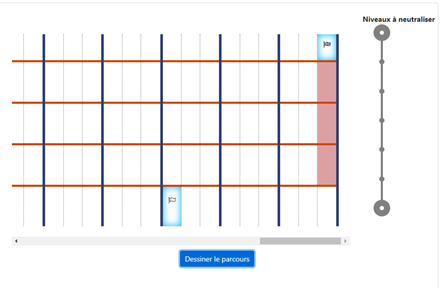
The safest thing to do is to prohibit the inaccessible location in the WMS too, and simply prohibit the entire column with EYESEE Drone.
Regular maintenance of EYESEE drones is essential to ensure their proper functioning and prolong their lifespan.
To ensure optimal use of these equipment, the EYESEE team recommends a series of visual checks and cleaning procedures.
These guidelines aim to ensure that every component of the drone is in perfect condition and that flight performance is not compromised.
By following these recommendations, EYESEE operators can minimize the risk of malfunctions and maximize the reliability of their drones during missions.
🆘 For any questions or assistance requests, EYESEE support remains reachable at help@eyesee-drone.com.
Deleting a face (regardless of the number of versions) is only possible if no mission has been created on the face.
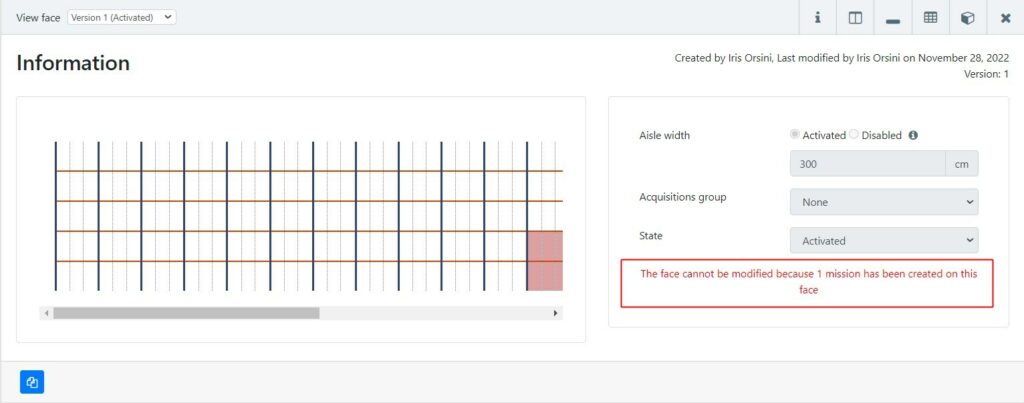
For more details, see the article Deleting a mission.
Once the mission(s) has (have) been deleted, it is possible to delete the face on which it was created.
If there are more than one version, it is necessary to delete all versions to remove a face.
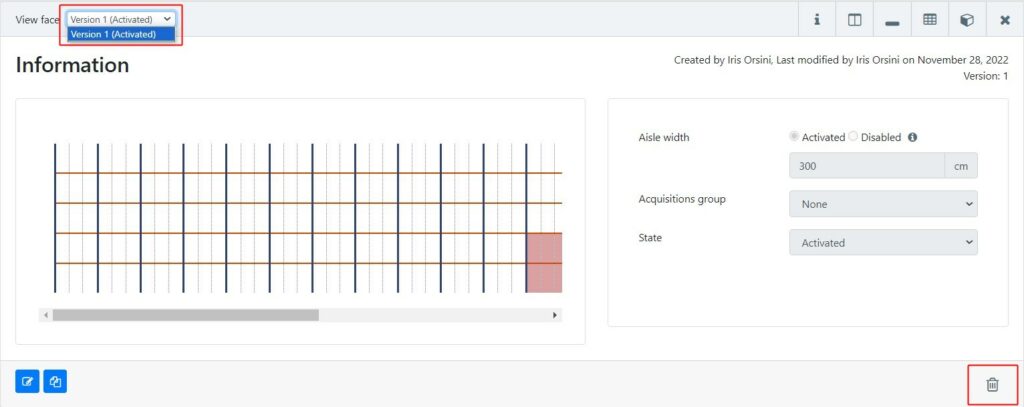
In the face list, click on the face you wish to delete. You can choose to delete the version of a face by selecting it from the drop-down menu:
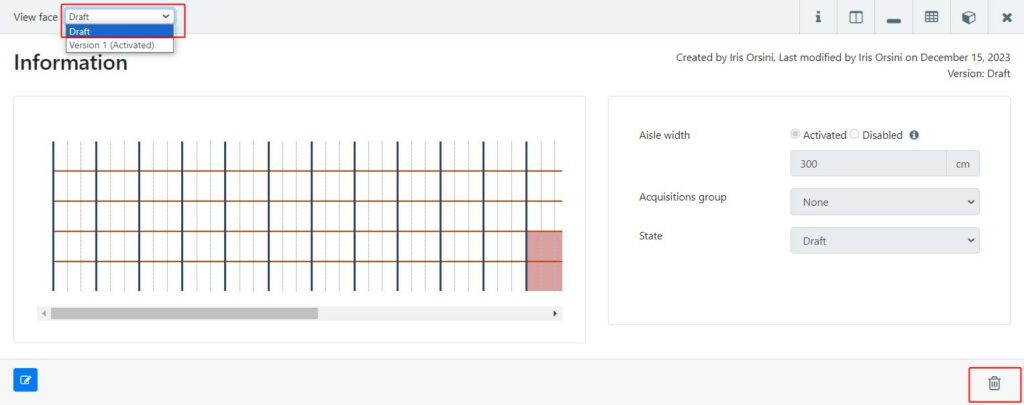
In this example, only the ‘draft’ version has been deleted and only version 1 remains:
In this case, it is necessary to delete the missions created on this face first (whatever the version of the face if there are several).
The deletion process then proceeds in the same way as in the example above, until you have deleted the last version of the face in order to delete it definitively.
Deleting a mission from the Cloud does not delete the mission from the tablet.
If you delete a mission from EYESEE Cloud and launch it again with EYESEE Drone, it will not be possible to upload it on EYESEE Cloud.
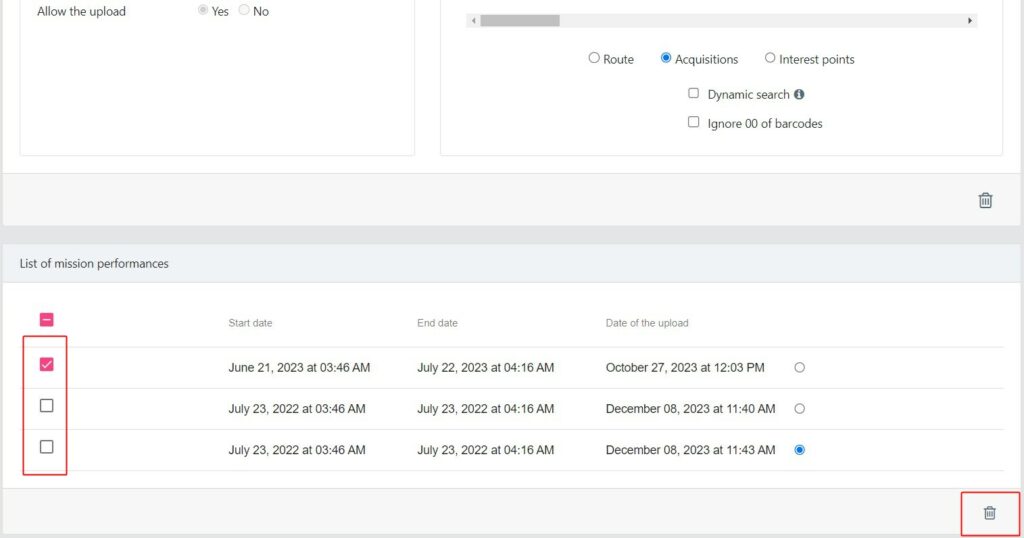
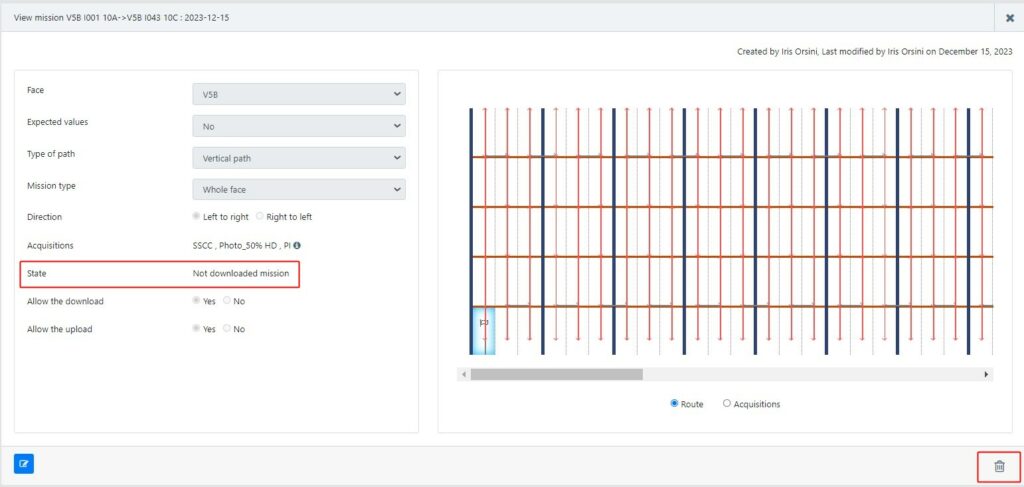
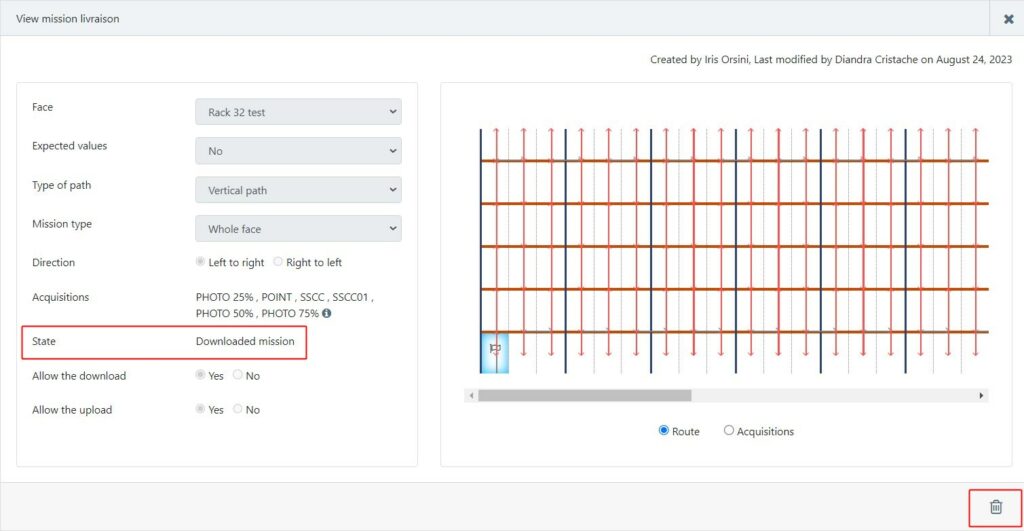
From the Missions menu, click on the mission you wish to delete.
To delete this mission, click on the icon at bottom right:
To delete this mission, click on the icon at bottom right:
To delete this mission and all its executions, click on the icon at bottom right:
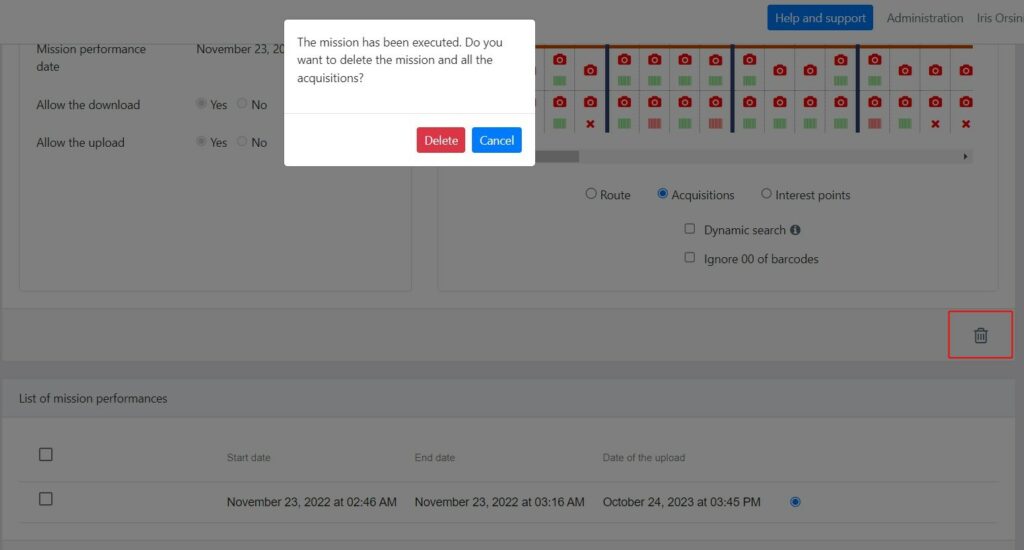
Select an execution, then click on the delete icon at the bottom right of the execution list: